


Shirt Dress Love - Love Sewing Mag Pattern Review
I am excited to share my review on this shirt dress I made for issue 85 of Love Sewing Mag which is out now!
It is no secret that I love shirt dresses but it had been a while since I made a fit and flare style. So when I was asked to review this pattern, I immediately jumped at this opportunity to sew one up. As always, this is my honest review of the pattern.
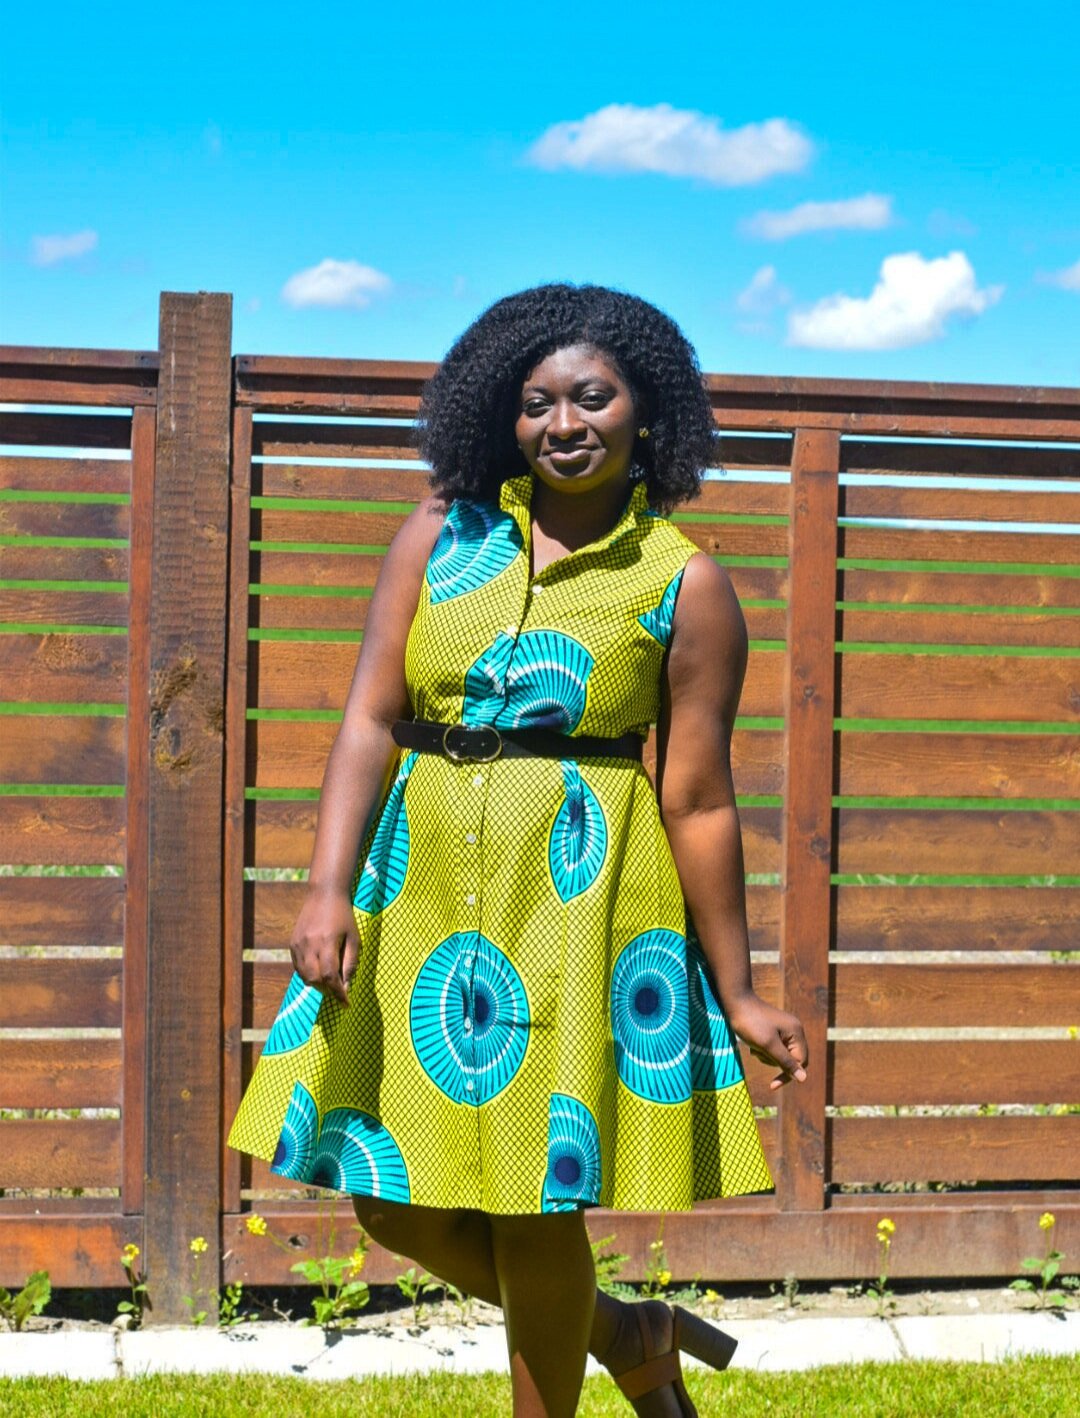
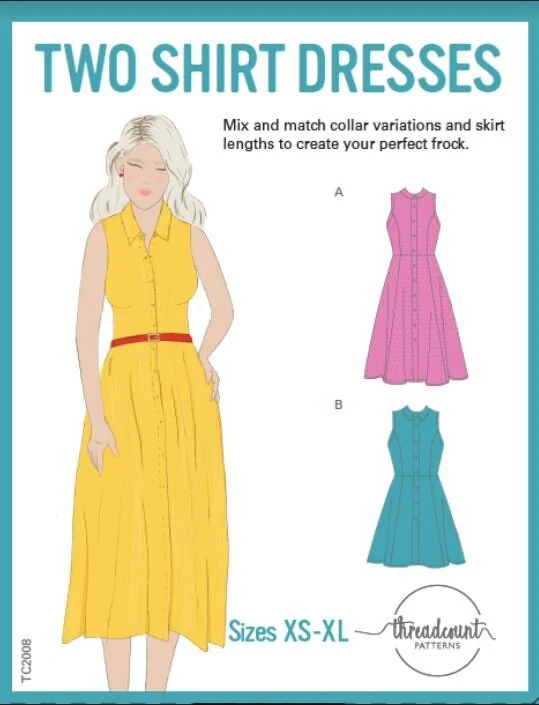
Pattern Details – TC2008 is the pattern I reviewed. This fit and flare shirtdress features a fitted bodice with princess seams, a skirt with in-seam pockets, and a placket down the entire dress. View A has a collar and is knee length while View B has a collar stand and is midi length. The sizes available are XS to XL which is 34” to 46.5” in the bust, 27.5” to 40” in the waist, and 56” to 68.5” in the hips.

Pattern size – I made the medium size and mixed up the views to achieve a knee length dress with a collar stand (i.e. View A length with View B collar). For reference, my body measurements are bust 40”, waist 34”, hips 45”
Fabric – I used a vibrant 100% cotton African wax print

Adjustment/Pattern Modifications – There are a few things I did to achieve as close to a ‘perfect’ fit as possible:
I sewed a 3/8” seam allowance for the bodice side seams, instead of a 5/8” to ever so slightly reduce the fit in the bust area.
I shortened the bodice by 1”
I finished the armholes with bias tape instead of the facings as I personally prefer the look.
I used a snap instead of a button/buttonhole for the collar stand closure. I knew that area was a little too bulky for my machine to handle and it came out much cleaner.
I serged the hem and folded it up by only ½”. Folding a double hem at 5/8” each would have made it slightly shorter than I would have wanted. For reference, I’m 5ft 4”.
I made my buttonholes 2.5” apart instead of the recommended 3”.

Things I observed during my sewing process –
The finished garment measurements for the bust, waist, and hips are only located on the pattern itself. Only the ‘back length from waist’ finished measurement is located on the pattern envelope. This is very similar to using Big 4 patterns. I personally think it is always helpful to have finished garment measurements on the pattern envelope as well.
It’ll be great for more sizes to be available so more sewists can access such a beautiful pattern.
I am not sure if the estimated fabric needed for the project (provided on the envelope) is in yards or metres. The fabric width is also only available in centimetres.
Things I loved –
Of course, there are pockets! I always love when pockets are included as you can choose not to sew them if you wish.
I appreciate the buttonhole guide being added to the sewing instructions to give sewists an idea of buttonhole placement.
Pattern clarity is always important especially for beginner sewists. I think a lovely job was done with these instructions.

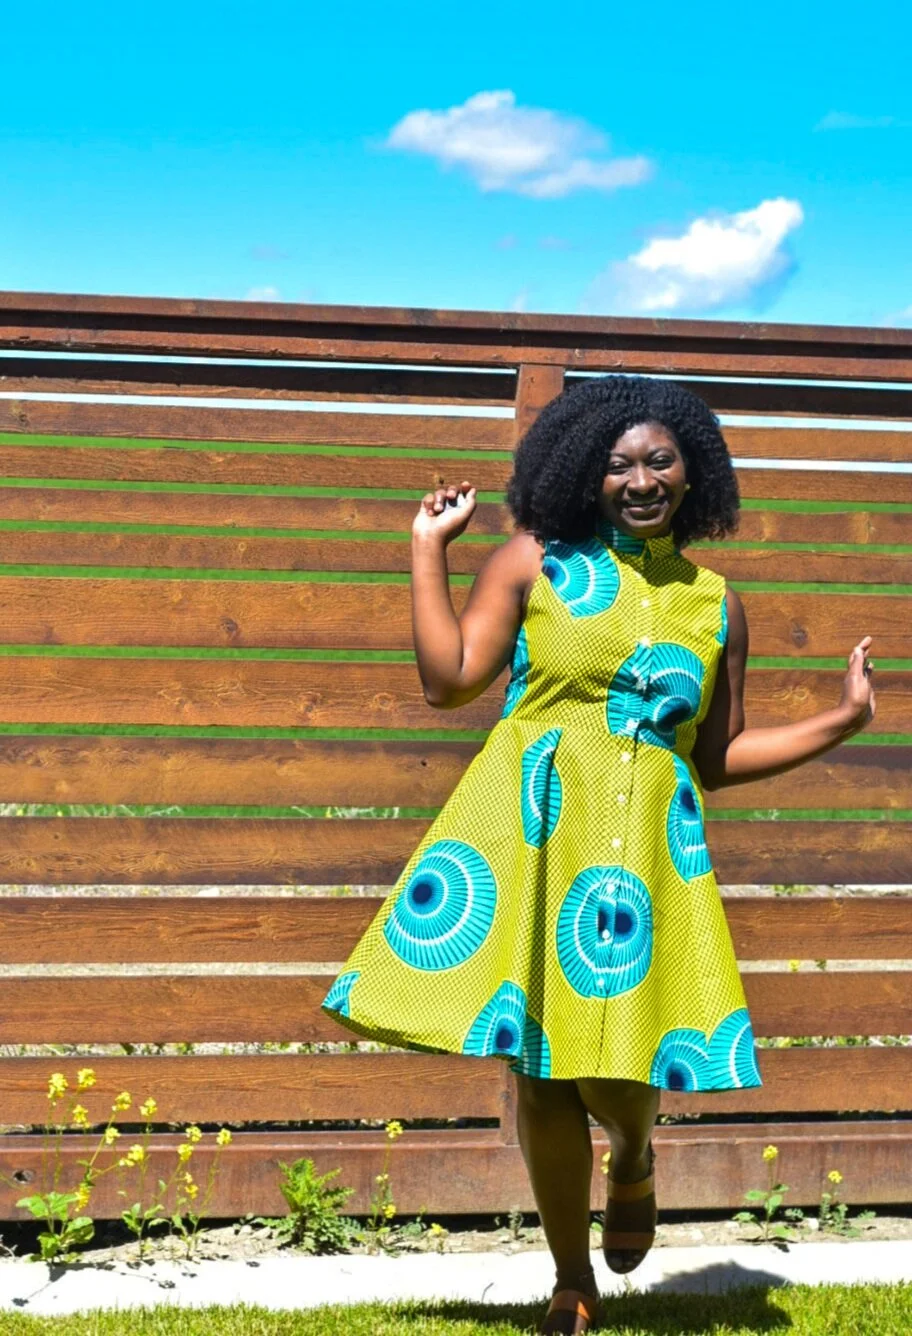
Styling – I went simple this time, styling it with a pair of brown sandal heels. I added a belt to see how it would look and I loved it. It is also possible to wear this dress without closing the buttons up all the way to the neck. Simply press to create a lapel look. How cool is that?
I hope my review will help as you make this pattern too.
Happy sewing,
Sylvia XOXO


