


Double the Fun! My Anna Dress Review
I have been admiring the Anna Dress pattern by ByHandLondon for years now but somehow never made it until a couple weeks ago. I have fallen hard for it and I am on a mission to make it one of my go-to patterns. So far, I have made it twice with minor adjustments to my second version. I am sharing my thoughts on this pattern and the slight adjustments I have made for a better fit.

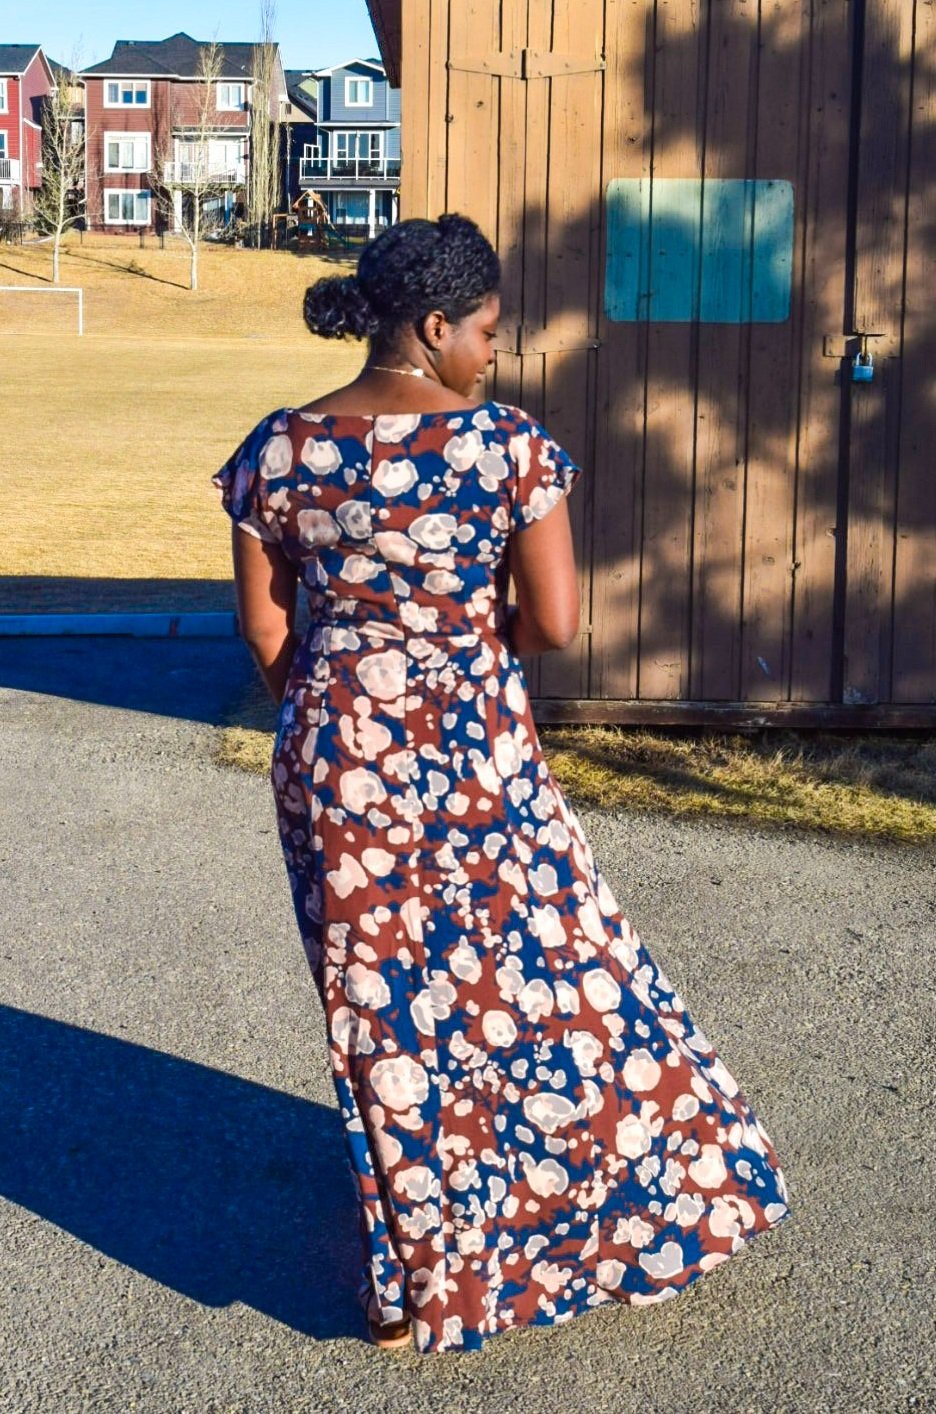
Anna Dress #1: Maxi Dress
Pattern Details
The Anna Dress features double pleats at the bust, grown-on sleeves, an A-line paneled skirt, two neckline variations, two length variations, and an optional thigh-high slit if you dare. It comes in two size ranges B cup (up to 54”bust) and D cup (up to 67”bust) which are sold separately FYI.
I sewed up a size US12/UK16, B cup (based on the finished garment measurements) but graded up slightly at the waist (more details under ‘adjustments’). For reference my body measurements at the time of sewing this were: bust 40.5”, waist 34”, hips 44.5”.

Anna Dress #2: Mini Dress
Fabric details
For my maxi length dress, I used 100% rayon fabric gifted by The Maker Studio (3.5 metres). For my polka dot mini dress, I used a rayon linen fabric I bought from Sitka Fabrics (2 metres). The wonderful thing about this pattern is that a wide of fabrics can be used. However, I highly recommend using fabrics with a lot of drape. I personally think it looks great in such fabrics. Ok now let’s jump right into what adjustments I made.

Pattern Adjustments (maxi length dress, 100% rayon)
1. Waist - The finished garment measurement puts the waist for size US12/UK16 at 32.5”. Since my waist usually floats around 34” to 34.5”, I added 1/2” to each side of the bodice pattern (i.e. a total of 2 inches to the bodice pattern once sewn up). Surprisingly, I ended up taking out the 2 inches out after trying the bodice on the first time because it was too big at the waist. I was very confused by this but I think my fabric contributed to that. Although I used a woven fabric, it had some give when stretched horizontally so there was really no need to add 2 inches. I even inserted the zipper an inch from the back edge (instead of 5/8”) and it still fit great.
P.S. This issue is very specific to the characteristics of the fabric I used so although I removed the additional 2inches from the side seams, I did not make that change on the paper pattern.
2. Length - This pattern is LONG! I ended up shortening it by 8 inches for the maxi dress. I am 5’4 so just make sure you are aware of this and adjust before cutting to save some fabric.

Pattern Adjustments (mini length, 70% rayon 30% linen)
1. Waist - The finished garment measurement puts the waist for size US12/UK16 at 32.5”. Since my waist usually floats around 34” to 34.5”, I added 1/2” to each side of the bodice pattern (i.e. a total of 2 inches to the bodice pattern once sewn up). This fabric has a slightly heavier weight compared to the fabric I used for my maxi version so it fit just right.
P.S. I inserted the zipper an inch from the back edge (instead of 5/8”) so really, I should have added less than 2 inches overall but I like inserting zippers at that measurement so I decided to leave it as is.

2. Length - The pattern features a midi and maxi length but I decided I wanted this one shorter so I shortened the midi length by 4 inches.
3. Bodice length - I shortened the bodice pattern by 1 inch. Although the original bodice length works (as seen on the maxi dress version), I typically prefer by bodice pieces to sit a little higher than most people. I love where my new bodice sits.

4. Bodice pleats/darts - Next time, I will lower the darts by 1”. Because I shortened the bodice length above the darts, it meant the darts moved 1 inch higher than where they originally were so they are not sitting under the boobs like they should. Of course I should have known that reducing the bodice length the way I did would mean readjusting my pleat/dart length. It is an easy fix that I can actually still correct on my polka dot version.
5. Neckline Facing - This is not an adjustment but thought it was worth mentioning. Although the instructions ask to topstitch the facing at the neckline, I chose to under stitch for a cleaner look. I also stitched the facing down at the shoulder seams using the ‘stich in the ditch’ method. Once the zipper was inserted I sewed down the facing to the zipper as well. This ensures that the facing is not popping up while wearing it.
6. Slit - I think I am going to move the slit to the right the next time I make it just to see which side I’d prefer to have it on. The pattern originally has it on the left.

Additional Feedback
Patterns with grown-on sleeves typically do not become a favorite of mine but there is something about this one that just worked for me (probably because they are short sleeves). The neckline is a smidge too wide which means your bra strap may show depending on what type it is. I didn’t bother to make any adjustments to it because I have bras that work for it. Also, sneaky bra straps do not bother me enough for me to make any adjustments. We’ll see if I change my mind.
For such a beautiful pattern, it is quite a quick and easy sew and a great one for beginners to try. Depending on the fabric used, this could be a super casual or super glam dress. There are endless ways to hack this pattern. I cannot wait to make all the versions I have dreamed up already. It may only be February but I am confident this is going to be one of my staple patterns this year.

I’d love to know your thoughts if you have made this or plan to make it.
Happy Sewing,
Sylvia XOXO


