


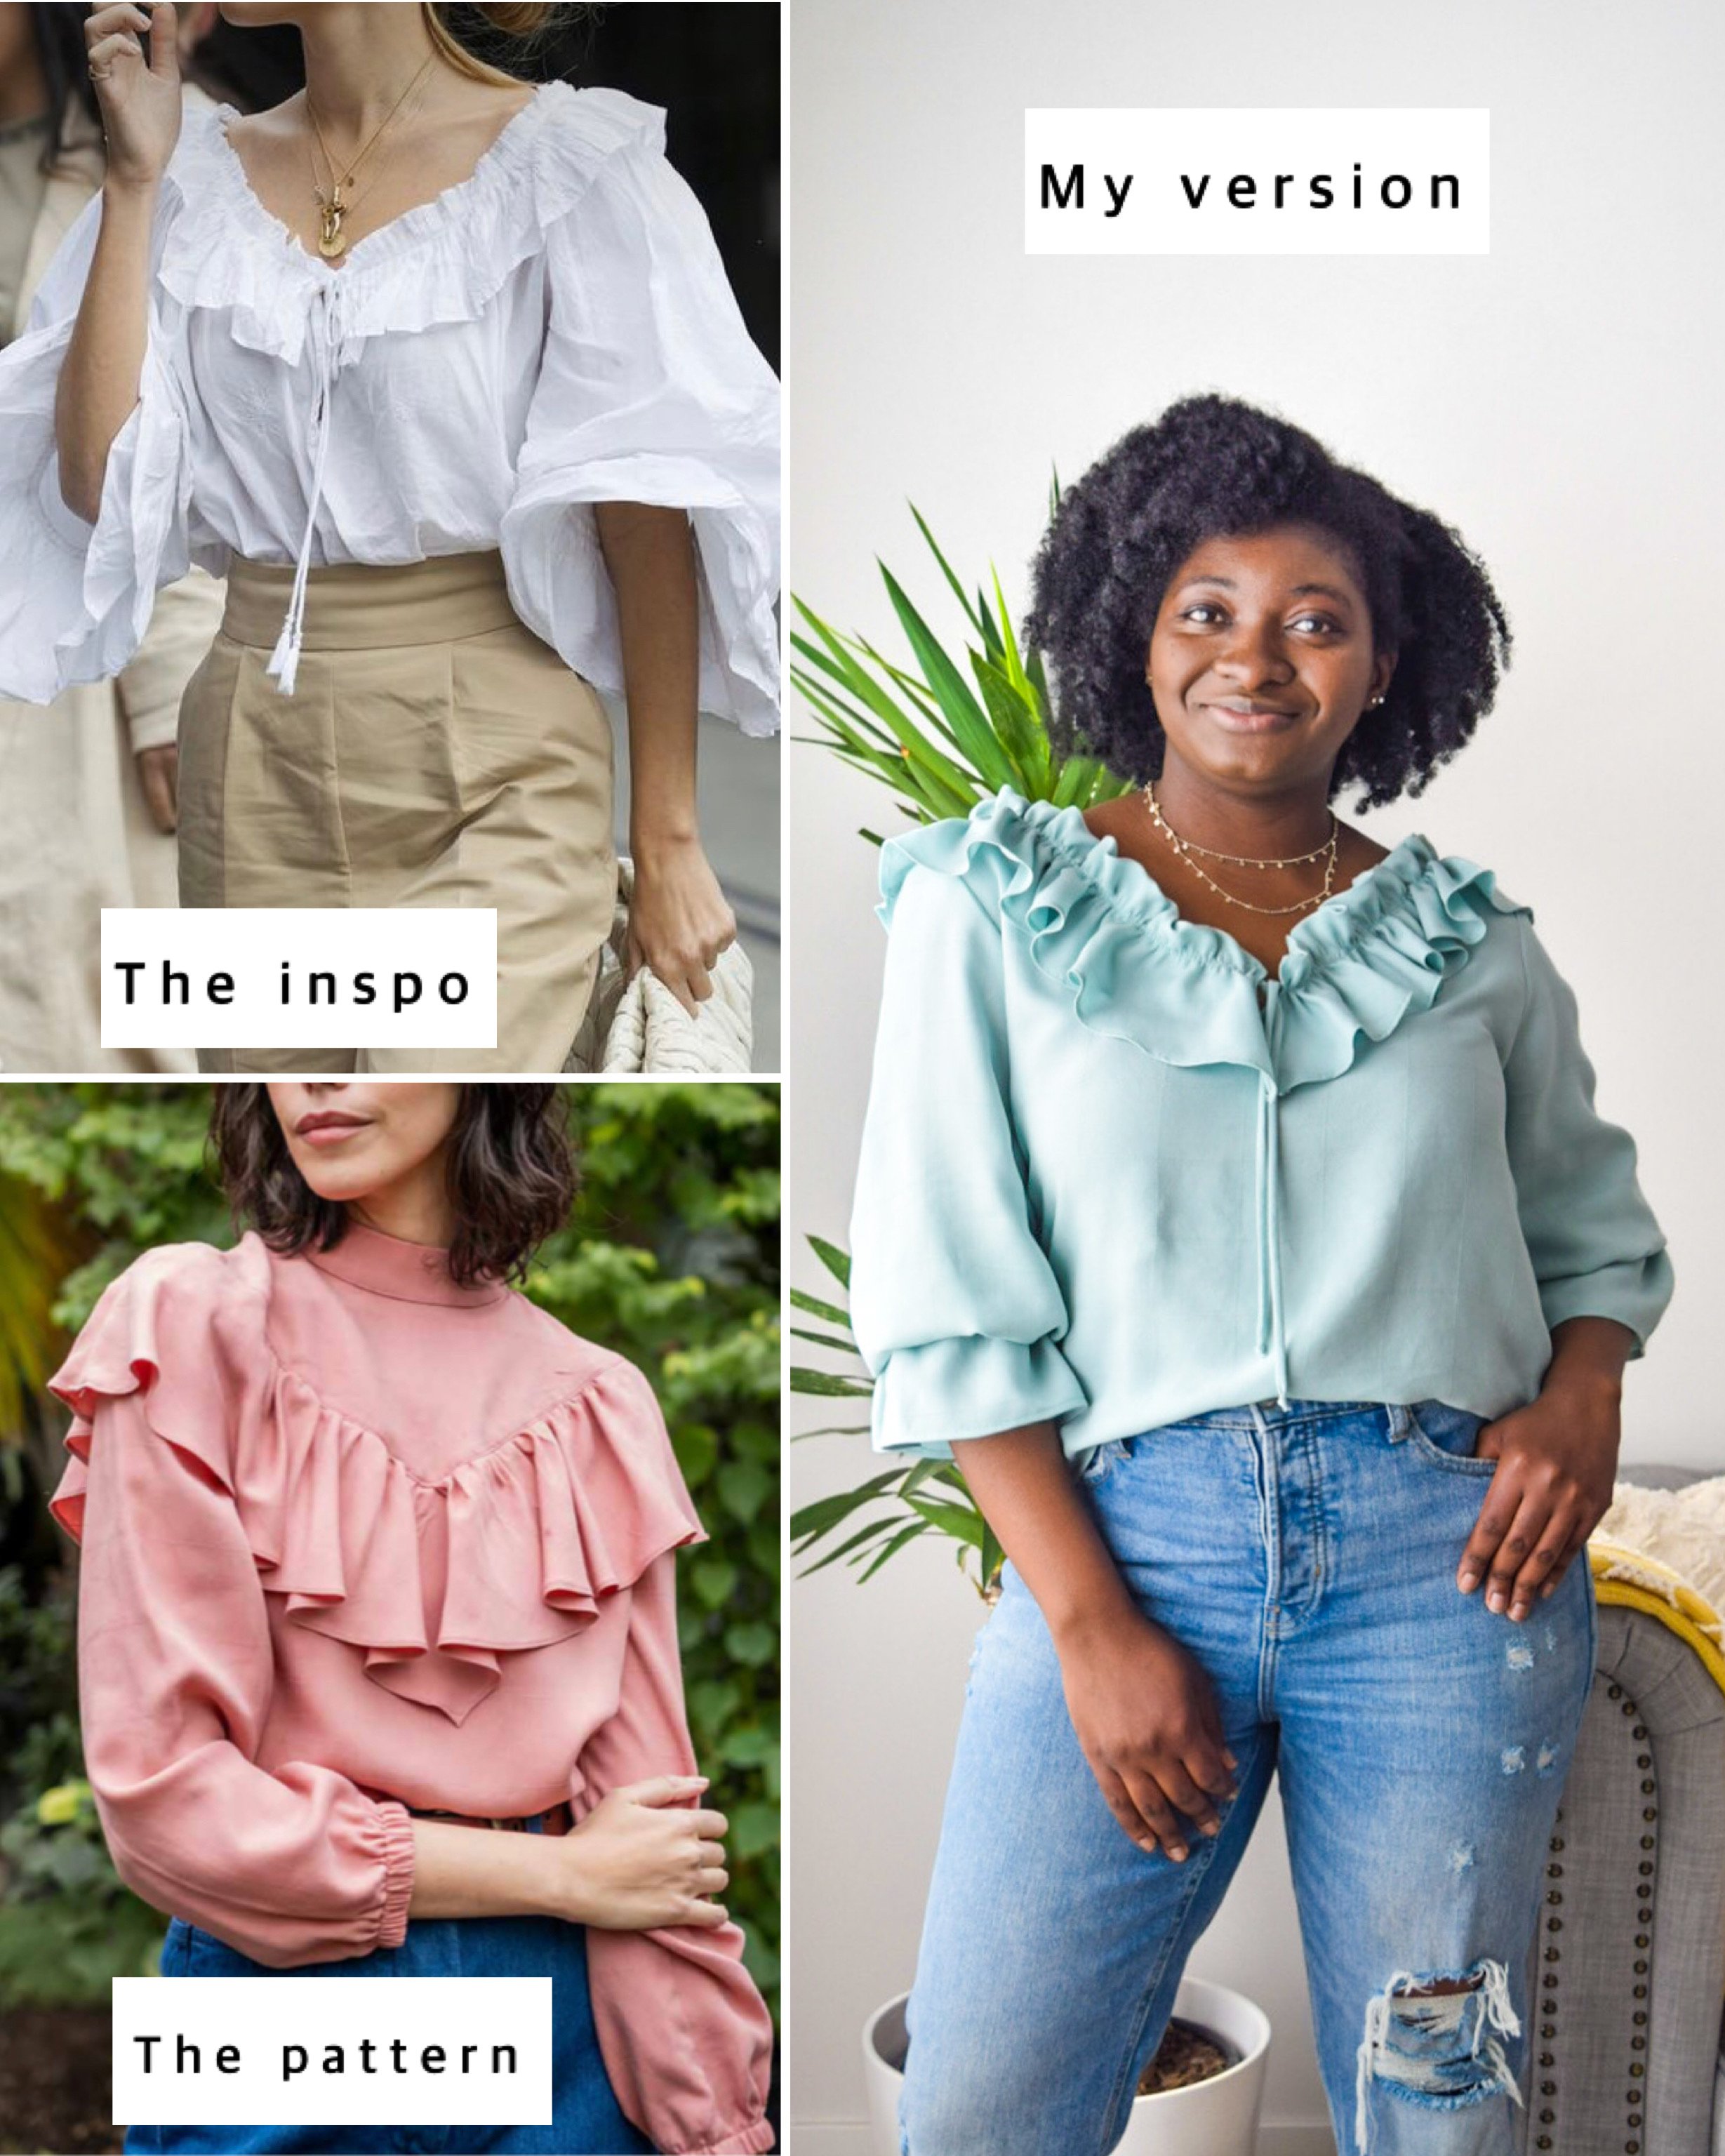
DIY Pinterest Inspired Ruffle Top
It has been a while since I made any of the hundreds of inspiration garments I pin on Pinterest so you can only imagine my excitement when I realized I had the perfect fabric and pattern to finally make one! This project did not go as smoothly as I hoped and lessons were learned. Let’s delve right into the process of making this gorgeous top!
Pattern Details
I used the Edith pattern by Fibremood as a base for this project. The first time I saw the Edith pattern, my brain immediately went to this Pinterest Top so I knew I had to at least give it a try. The similarities are obvious and so I thought it would be relatively easy to hack the pattern. I cut out a size 14 for this pattern (pattern goes up to 57” bust). For reference, here are my measurements at the time of making the top 41” bust, 34.5” waist, 44.5” hips.
PS. I made this garment as part of a paid collaboration with Fibremood + Polytex Stoffen + Mettler Thread

Fabric Details
I used 100% tencel fabric from Polytex Stoffen. It has a beautiful drape, perfect for showing off ruffles and gathers and the color is a gorgeous mint (tricky to capture accurately in photos).


Pattern Adjustments
Eliminated yoke and collar - You’ll notice that the Edith pattern I hacked (pictured above) has a yoke and collar which I did not need for my version so I did not cut those pieces out.
Front bodice slit - I cut a 2 inch slit at the center of the front bodice, finished it off with bias tape, and added two ties to the front.
Shoulder adjustment - I added an inch at the shoulder of the pattern piece to ensure the top sat comfortably without sliding off my shoulder (it didn’t. Keep reading to find out what I plan to do).
Sleeves - I used the slash and spread method to add volume to the sleeve, then added elastic 5 inches from the hem of the sleeve.
Length - I shortened the pattern by 2 inches as it was too long for me.
Ruffles - I cut out the ruffle piece with no adjustments, then I folded it 1.25 inches over at the top and put two gathering stitches in 1 inch below the foldline. The gathering stitches also served as a guide to where the neckline of the top would be placed.
Bra strap snaps - Even though I adjusted the shoulders, I guess I did not do a great job with it because it keeps sliding down my shoulders so I will be adding bra straps snaps at the shoulders so I can hook it to my bra and stop the slipping.

I was making these adjustments on the fly which is why this project almost didn’t work out. Thankfully it did but the trade-off was having not so nice garment insides. Let’s just say, lessons have been learned. I am pretty pleased with the final look though.
Happy Sewing,
Sylvia XOXO


